Unpackaging
Shipping company has delivered your system and you’re ready to tear up the boxes. Word of advice here, try and keep as much of the original packaging as possible. Not only will it help you maintain all documents and accessories in one place, but you will also have the packaging ready if you ever have to send the system in for any kinds of repairs that would be outside your scope of system building.
When you got the system out, inspect the case thoroughly and look for any signs of damage, scratches or similar issues. It is important that you do this as soon as you receive the package, and of course just like any other package you should always inspect the box before you even accept it. If the box looks damaged, has holes in it or looks beat up, the system may have been damaged.
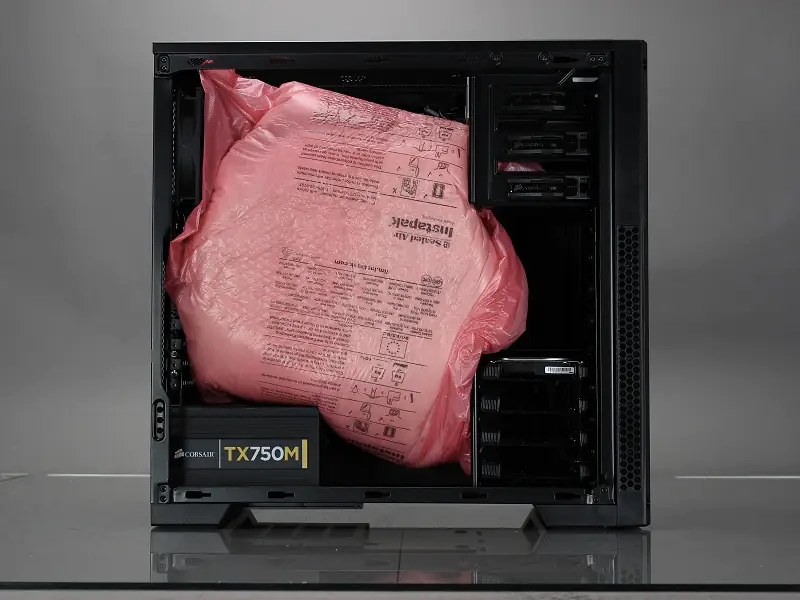
You will probably notice that there’s a piece of paper attached to the back of the system. This piece of paper instructs you to perform some basic checks before turning the system on, which in actuality is the more condensed version of this guide. So, the first thing you must do is remove the side panel (if standard desktop computer) or top panel (if mini pc or HTPC) in order to access the system from the inside. For most systems, it would be the left side panel when looking at it from the front. Typically, side panels are held in by thumb screws, regular screws or latch mechanisms that have to be freed before removing the side panel. Most side panels slide out to the back of the system, while some swivel outwards.
After exposing the inside of the system, chances are that your custom computer was padded with plenty of INTERNAL packaging to prevent any damage to the inside of the system. For those of you who bought large aftermarket coolers or long video cards, this packaging material is a life safer. Hold onto it as well in case you ever have to send the system in for repairs. Careful when you remove the packaging, as it is tightly squeezed into place. Putting too much pressure in any angle other than straight out may cause damage to components.
Checking the Internals
Once the packaging is out of the way, you should inspect the system inside and look for any obvious damage or disconnected wires and cables. Some cables may be left disconnected intentionally, but if you’re in doubt, you’re always welcome to call the support line with any questions you may have. Even though you may not know what you’re looking at, or you may not understand the parts inside of your system, all you have to do is look for anything that appears damaged. Bent clips, lose screws, scratches, broken cables and others are just some signs to look for. If all of it appears OK, then you can close up the side panel in reverse order you removed it and move on to the next step.
Making Initial Connections
In its most basic form, you will probably be hooking up some form of display (LCD, TV), mouse and keyboard (typically USB), a network cable (or wireless) and a power cable. This is the time to note that an accessory box was shipped out with your system. This is typically the same box that your motherboard arrived in. What we do at AVADirect is take all the extra accessories, manuals, cables, CDs, adapters and others and we put them in this box for you. Keep it safe, in case you ever need something from it. It will also contain extra hardware for installing things like hard drives, video cards, optical drives and others, should you need to expand your system further.
Power
Power cables are included with the systems and can be found in the accessory box. These will plug into the back of your system into the Power supply unit, and then into the Wall outlet or a surge protector. Make sure that the switch on the back of the system, near the power plug is in the ON position. Typically, this is the position with the “I” symbol pointing down.
USB
These are self-explanatory, however if you have an older style mouse or keyboard, (purple/green) connectors may not exist on your system. If this is the case, you will need a PS2 to USB adapter in order to plug in the mouse/keyboard. Newer motherboards are less likely to have these ports, while some may only have one.
Video
There are couple of different ways you can connect the video based on your type of display:
VGA – old port, typically blue in color
DVI – current industry standard, typically while or black (sometimes dark gray) in color with plenty of pin holes on it.
HDMI – used typically for TV displays, as well as some monitors. Equally good as DVI but also carries sound if that’s what you need.
Display Port – Another type of connector similar to DVI, looks much like hdmi with slight changes. Adapters are usually needed to convert DVI/HDMI cables into Display ports. Typically, you don’t need to use these unless you’re running more than 2 monitors.
Keep in mind that some systems come with 2 display adapters. If you bought a computer that has 2 display adapters, you must always plug the monitor into the dedicated video card on your system. How do you know if your system has 2? Easy, if you look in the back, and you notice 2 sets of video connections, 1 above all of your colored sound ports (blue, green and pink) and 1 set below, it’s the set BELOW that belongs to your video card. This is where you must plug in your monitor, as the other ports will be inactive on systems equipped with dedicated video cards. Also note that video cards may not have all of the above listed ports, but rather just 2 or 3. Most common is the DVI, followed by HDMI. Some have additional display ports, while other cards (very few) have old blue VGA. You may need to resort to using adapters if you have an older style plug on your monitor, such as DVI to VGA adapter. Also, take note of some of the port designations on the back of the card, typically labeled as DVI-A or DVI-D. The difference between these are that on DVI-A you can use the DVI to VGA adapter as this port can send Analog signal, whereas the DVI-D is digital only and cannot be used with VGA adapter.
Starting the system
Once you’ve completed all the steps above, you may turn on your system. If you purchased an operating system from AVADirect, then we make sure that the OS is installed, fully tested, updated and activated. Therefore, all you need to do is turn on the system and you’re ready to go. If you ordered a system without an OS, you will still receive a test version of Windows, just so you can see that your system is working fine. Then you can install OS of your choice.
*Disclaimer: AVADirect and its Staff are not responsible for any damage to software/hardware, loss of data or personal injury by following our How-To guides. These guides are provided only as an aid to help you troubleshoot system problems. If you do not feel comfortable performing these steps, it’s always best to send in your system to a local repair shop or contact an appropriate technical support line for additional assistance.


No comments yet