
Windows 10 Fresh Install Guide:
1 Backup any and all data you don’t wish to lose on the Operating System (“C”) drive, to a different drive.
2 (Optional) As an extra precaution you can unplug all of the secondary drives (with the system off) to prevent accidental data loss on your secondary drives.
3.1 Locate or create “Installation Media”
Note: If you already have an Installation Media (DVD/USB) prepared, go to step 4.
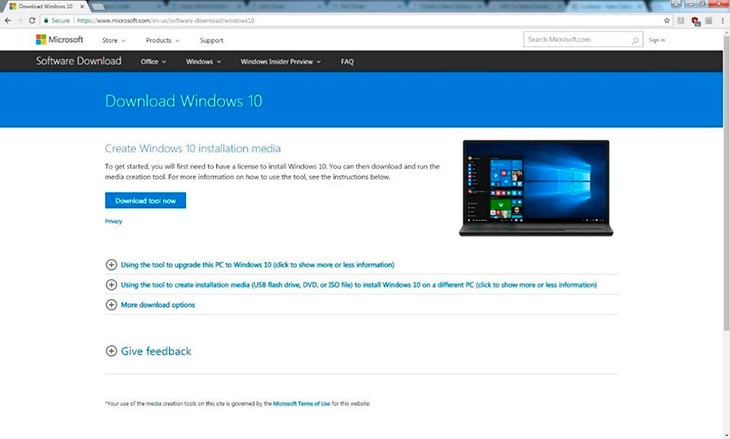
To begin creating your Windows Installation Media, click the link below.
https://www.microsoft.com/en-us/software-download/windows10
3.2 Click “Download tool now” and wait for the download to complete
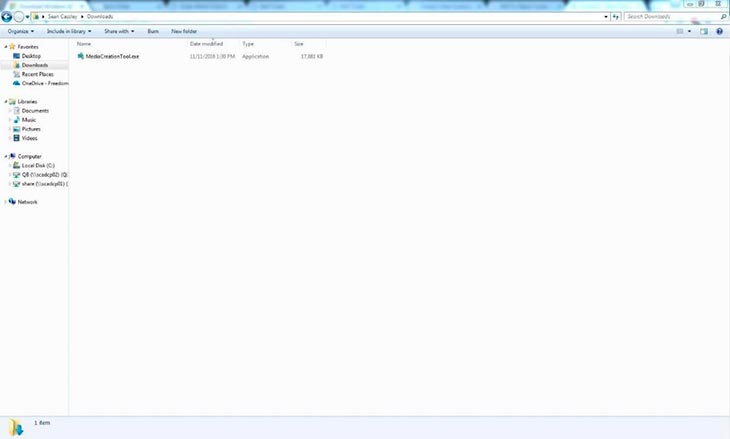
3.3 Navigate to your Downloads folder and open “MediaCreationTool.exe”
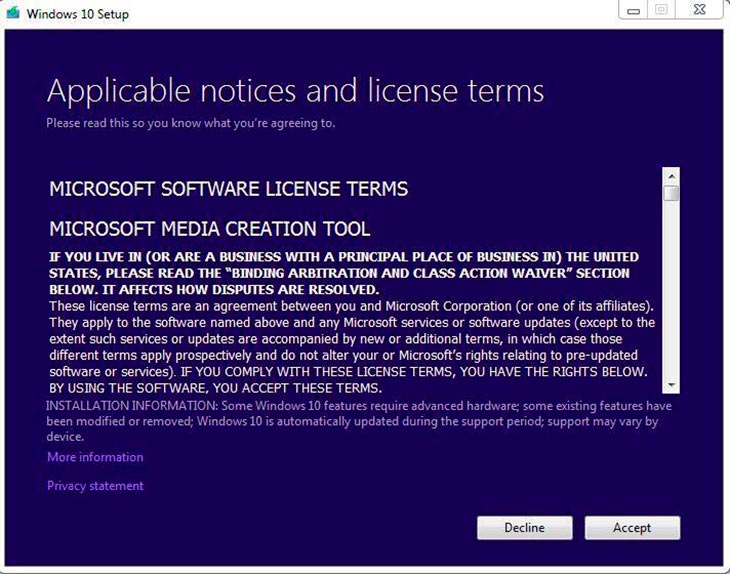
3.4 Accept the Microsoft Software License Terms
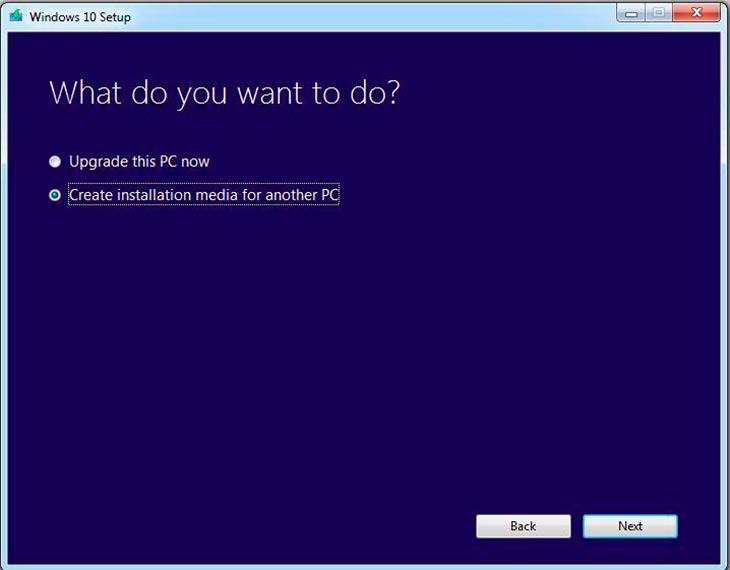
3.5 Select “Create installation media for another PC”
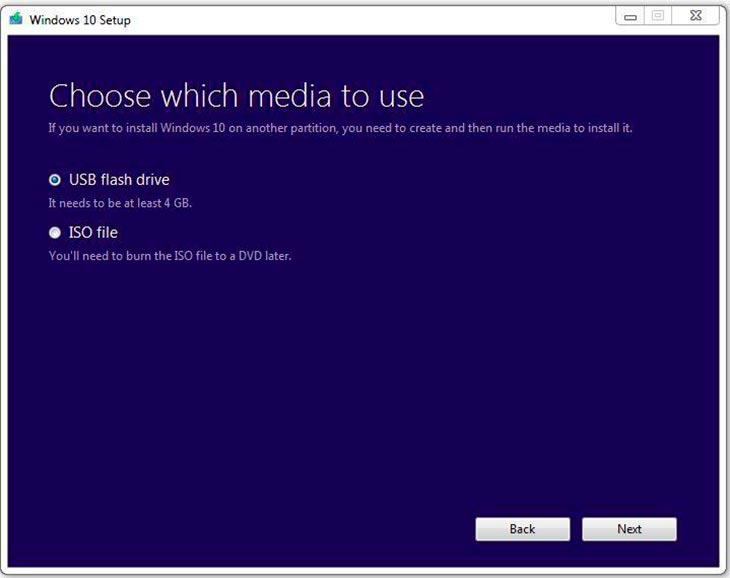
3.6 Select USB flash drive to create a bootable flash drive or ISO file to create a bootable DVD
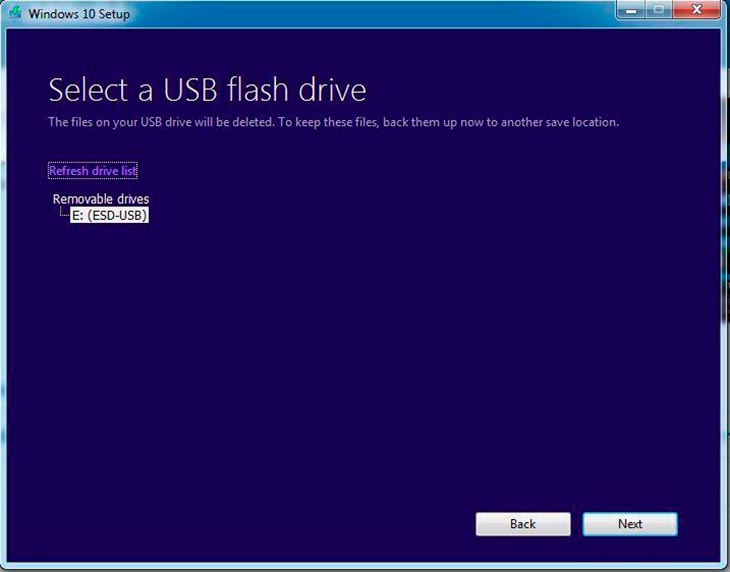
3.7 Insert the USB drive (8GB minimum) and select the desired Flash Drive (be advised, this permanently deletes all other data of the flash drive)
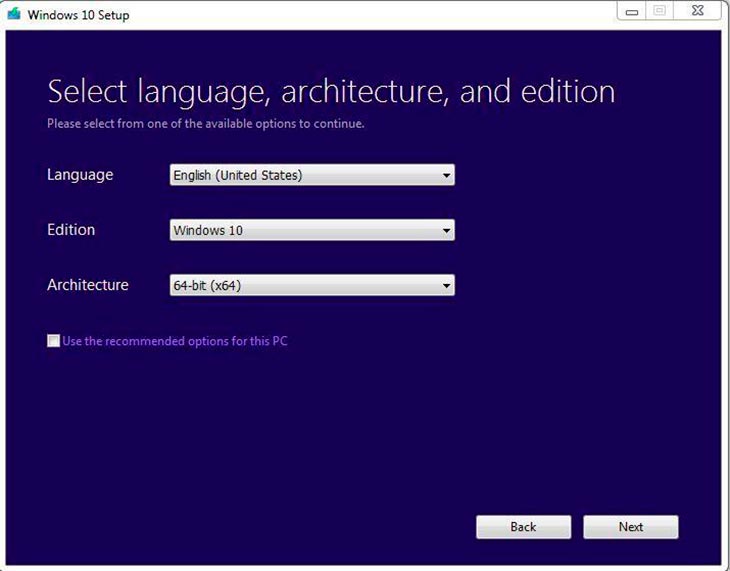
3.8 Select the language, edition, and architecture desired (if you are unsure which is right for you, contact Technical Support at (216) 503-6374)
3.9 Wait for the tool to complete the Windows 10 Download and Media Creation and then safely eject the flash drive
4. Insert Installation Media (Disk or USB) into computer.
5 Restart computer.
If computer automatically boots into Installation Media go to Step 7.
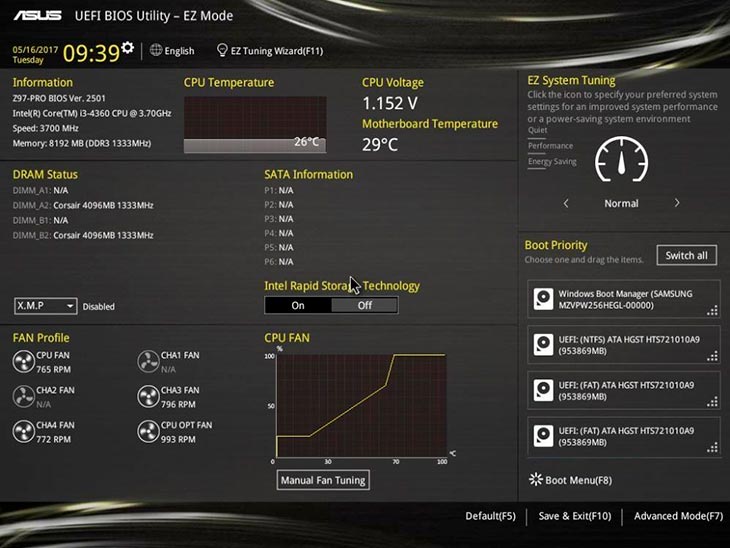
6 If computer does not automatically boot into Installation Media, shut the computer down, turn it back on and enter BIOS by tapping the F2 and Delete keys alternately on the keyboard until the BIOS screen appears. Specific pictures of BIOS can be found in the user’s manual for your motherboard, below is an example.
6.1 Once in BIOS enter advanced mode (usually F7)
6.2 Navigate to the “Boot” tab and select the USB or Disk Drive (USB for installation from a flash drive and Disk Drive for DVD installs) under “Boot Override”. This will force the computer to boot into the Installation Media. This option is sometimes found under the “Save and exit” tab as well.
Note: Sometimes the “Boot Override” option is located in the “Exit” tab.
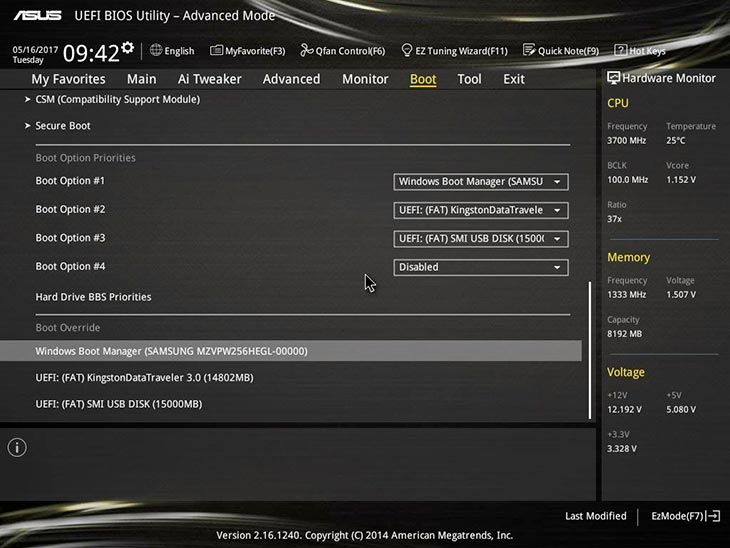
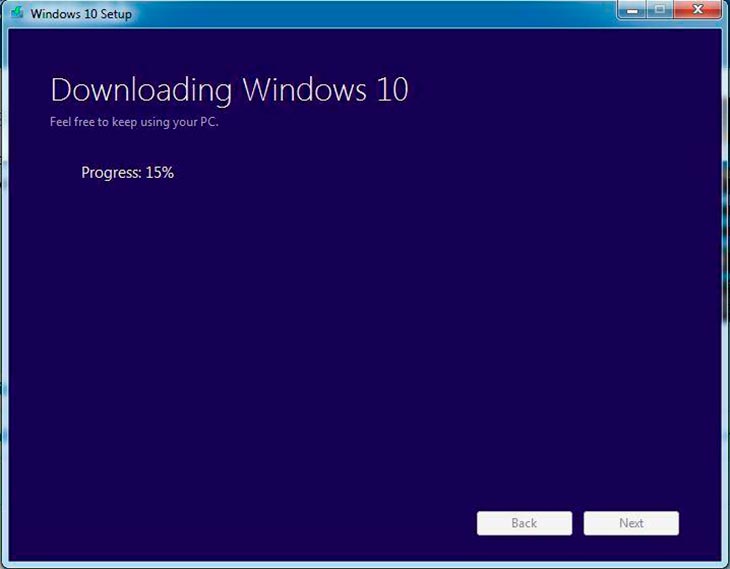
The BIOS will disappear almost immediately after selecting your Installation Media. If a message appears stating “Press Any Key To Boot….”, make sure to press any key on the keyboard within 5 seconds. Once the Windows Installation Media loads, you will see the screen below.
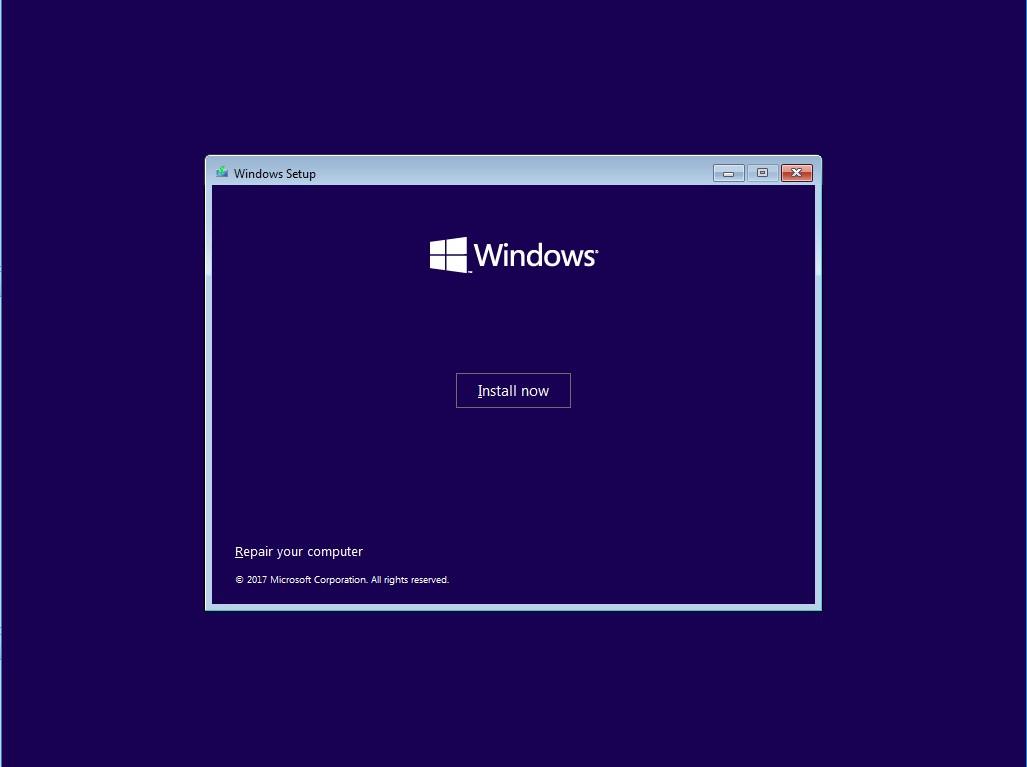
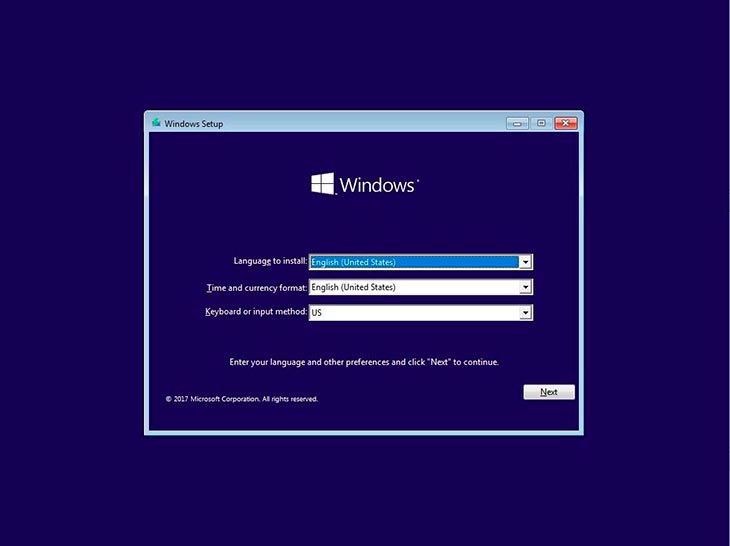
7.1 Select your Language, Time Format, and Input method before clicking “Next”
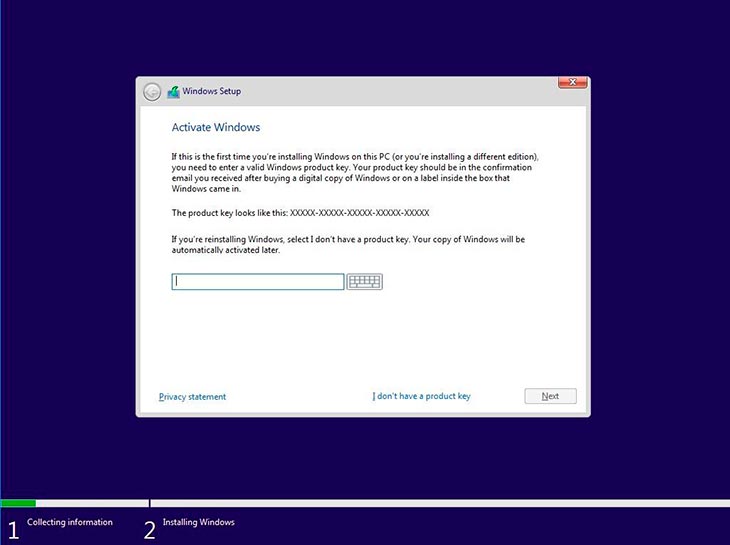
7.2 Click “Install Now”

7.3 Click “I don’t have a product key”
The key is typically registered to the motherboard, thus eliminating the need to re-enter it, however the key can be entered into Windows post install as well.
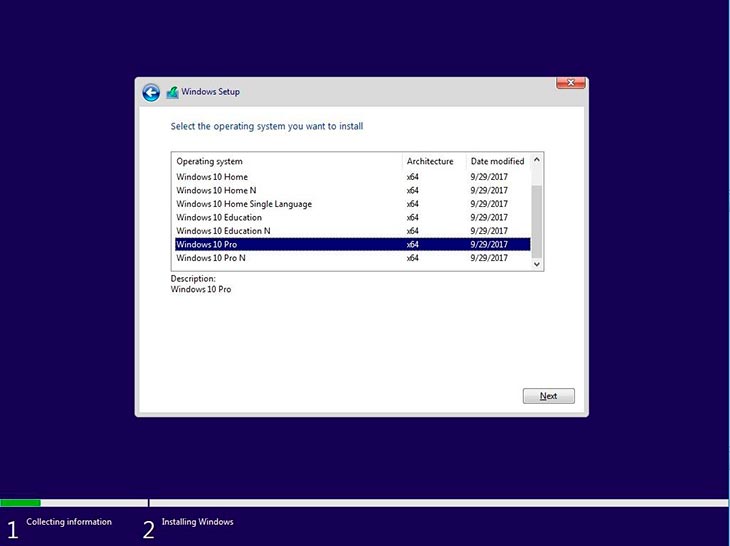
7.4 Select the edition of Windows 10 that matches your product key. The most likely options are Windows 10 Pro and Windows 10 Home.
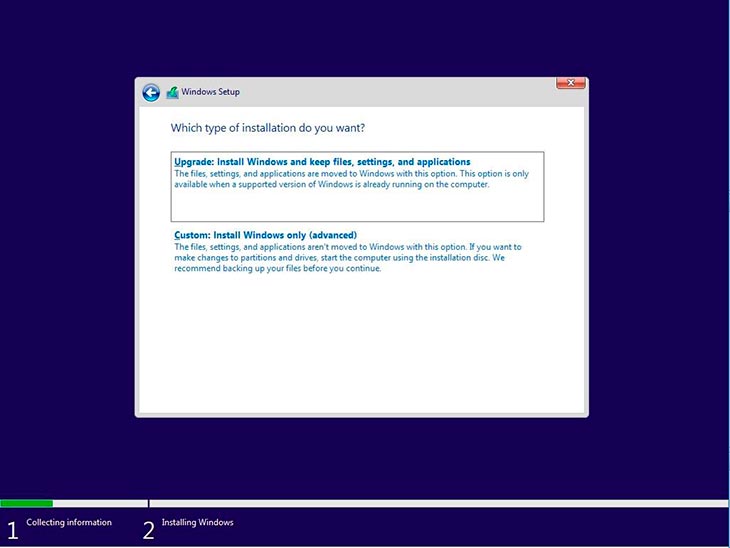
7.5 Select “Custom: Install Windows Only”
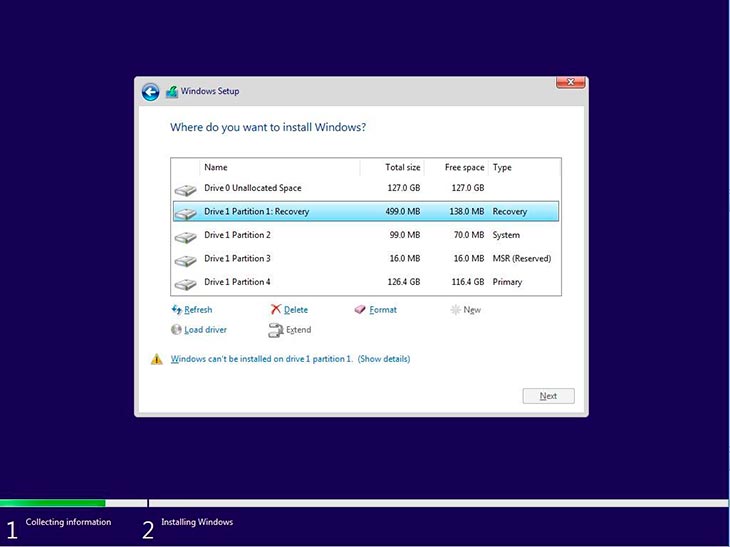
The initial screen will have a listing containing all of the partitions of drives installed in the system.
The more drives there are, the more partitions. Before proceeding, we will need to determine which drive Windows is to be installed. In order to determine which physical drive corresponds to the listing seen here, roughly add up each drives partitions to determine the approximate size. Please note that advertised drive capacities and actual capacities differ. Most 512/500GB drives will have approximately 460GB-480GB of usable space.
For example, take a look at the two drives below. One is a 128GB Corsair SSD and the other is a 128GB Samsung SSD. In most systems, the difference in drive capacity will be much greater than in this example. If one adds all of the partitions of each drive together, they end up at roughly the 127GB mark. Oftentimes systems contain a small, fast SSD and one or more larger HDDs.
If you are not sure which drive you would like to use, please contact our Support department, who will be able to guide you.
7.6 Select the drive that Windows will be installed onto

7.7Once you have determined which drive Windows will be installed on, begin deleting the existing partitions. Usually there are four partitions on the drive in question. Take care to only delete partitions on the correct drive (such as Drive 0in the below example) to ensure that no unnecessary data loss occurs. To delete partitions, highlight/click on the partition in question and click Delete at the bottom of the window.
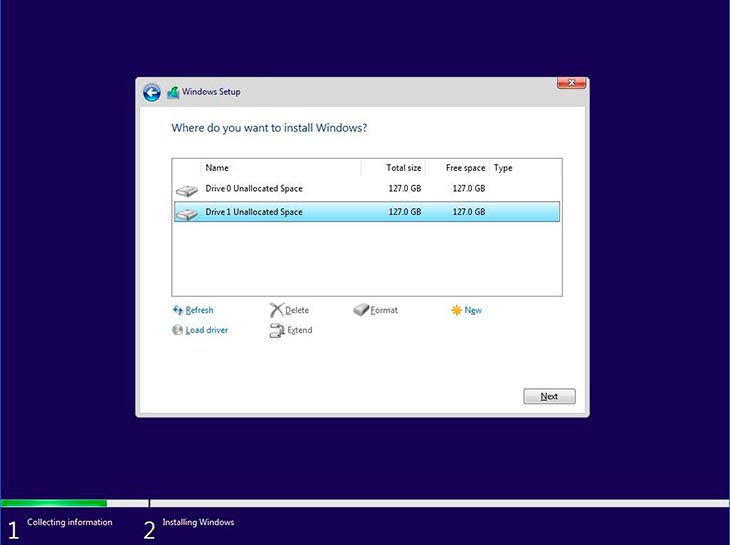
7.8 Continue until the only remaining listing for the drive is “Drive X Unallocated Space”. Then click “Next”.
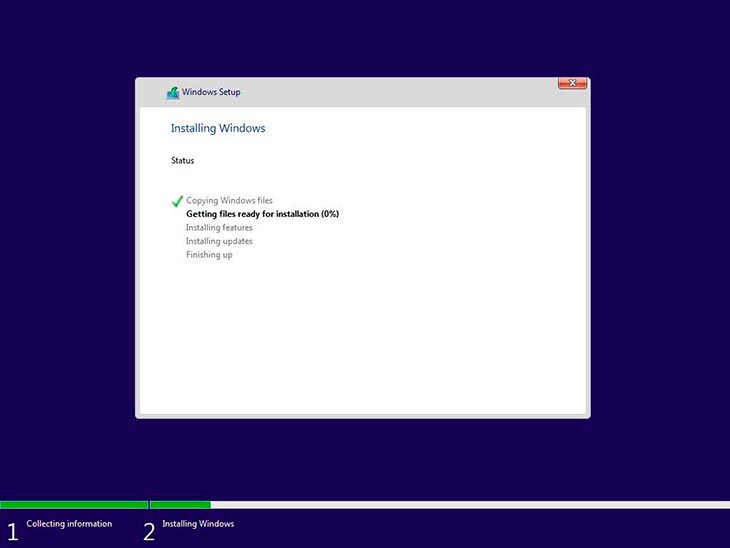
Windows will now begin to install. This process often takes 15-60 minutes and does not require monitoring. The system may restart multiple times during this process, do not turn the system off. If the system hangs for more than an hour after this point, call Technical Support at 216.503.6374, before attempting any troubleshooting.
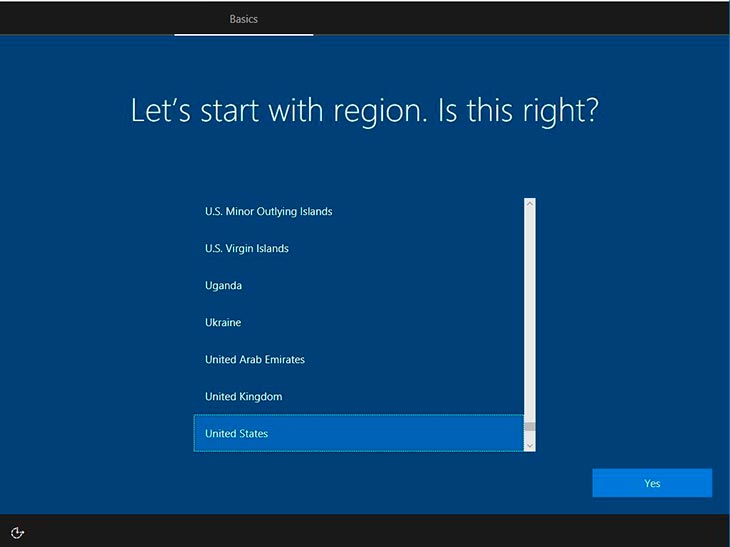
8 Once Windows has loaded, the screen below will appear. Select your region (most likely United States) and click the “Yes” button.
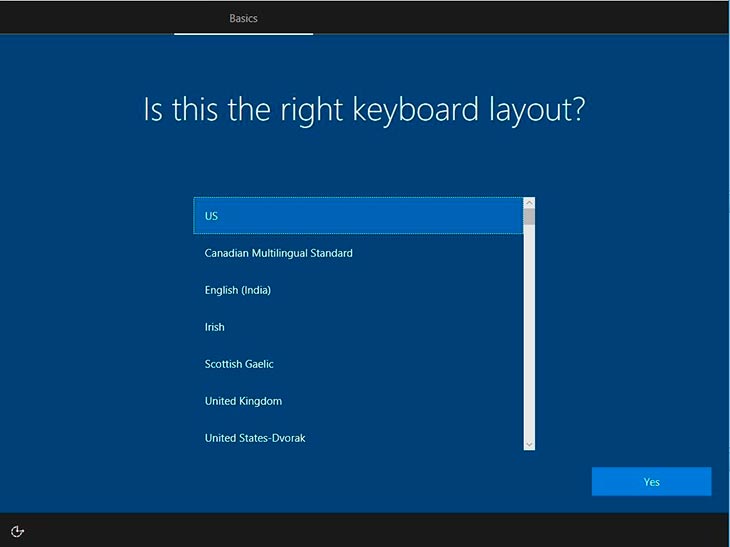
8.1 Select your keyboard layout (most likely “US”) and click the “Yes” button.
8.2 Click the “Skip” button.

8.3 Connect to your network (internet) if available. Ethernet refers to a physical connection while wireless connections will appear as set by your router/ISP.

8.4 Enter your username and click the “Next” button.

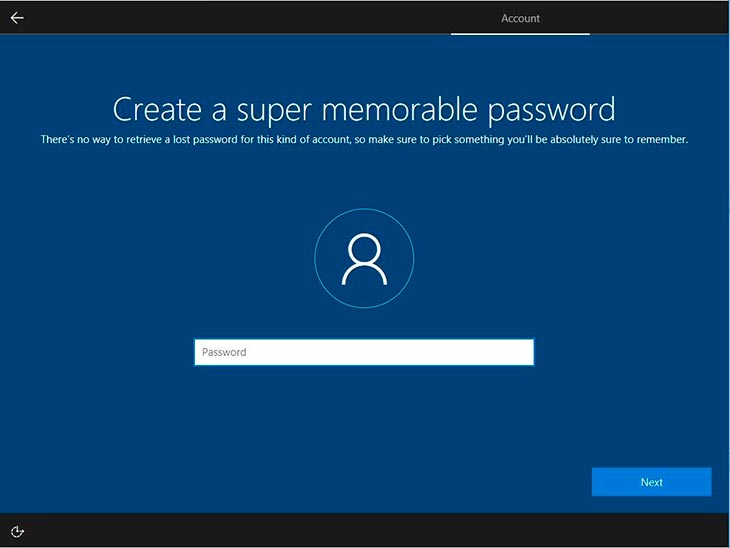
8.5 Enter your password and click the “Next” button.
Note: If you are connected to a network, an additional step in the username/password section will appear. If you have a Microsoft account, you may use that email/password combination in lieu of an “offline” or local account. If you do not have a Microsoft account, or would not like to use it, select “I don’t have a Microsoft account” and “Use Offline account” towards the bottom of the page when prompted.
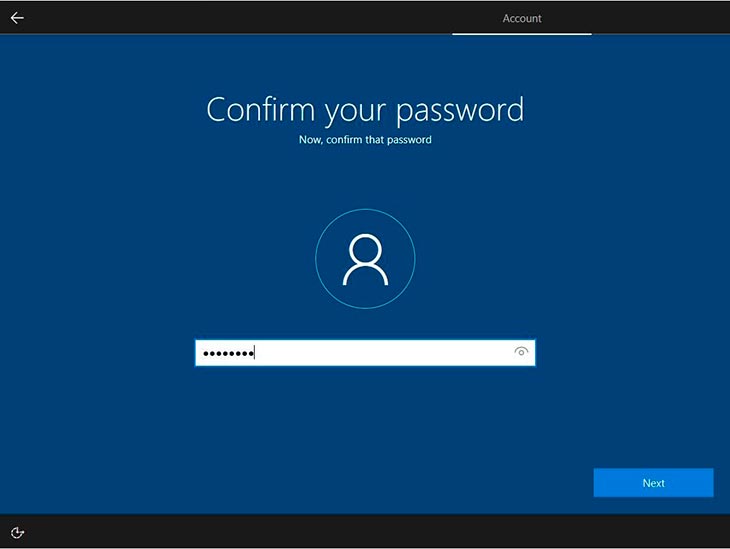
8.6 Confirm your password and click the “Next” button.
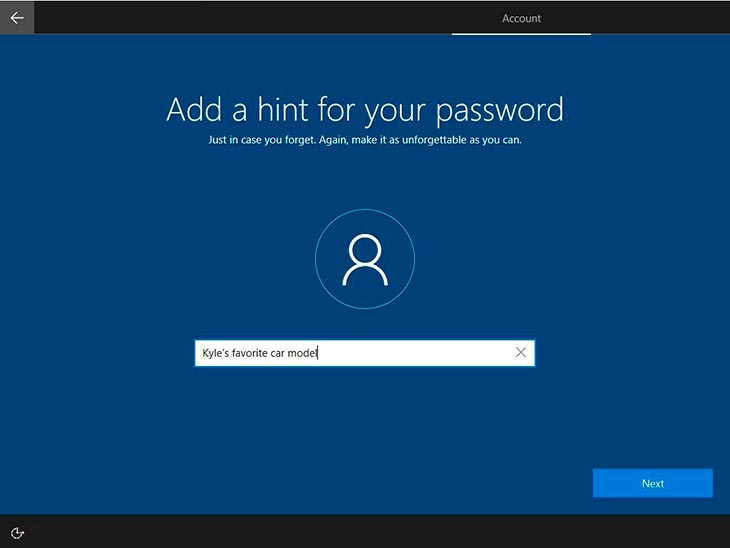
8.7 Create a hint for your password and click the “Next” button.
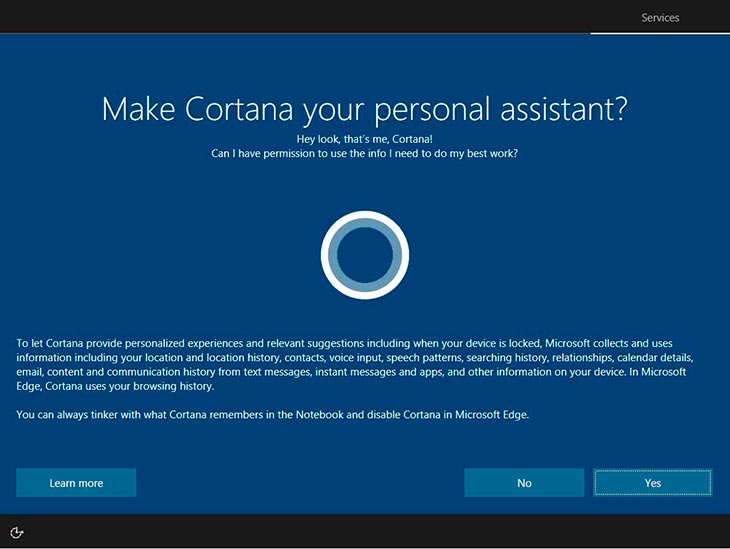
8.8 Decide if you would like to use Cortana as a personal assistant. For the least invasive privacy settings, click no.
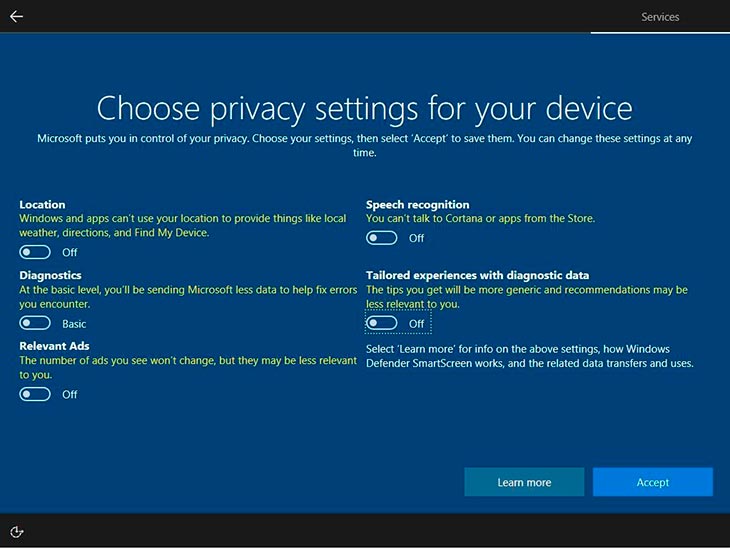
8.9 Select your privacy settings and click the “Accept” button. For the least invasive options, turn all five of these selections to “Off”.
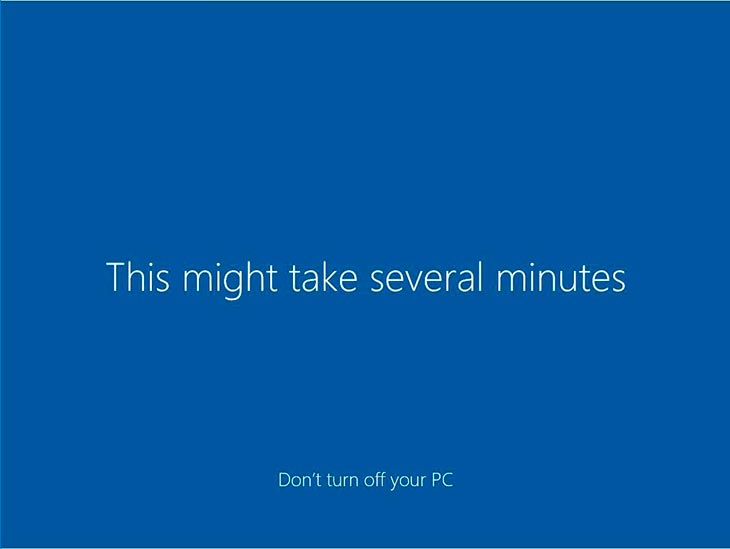
After selecting your privacy settings Windows will take back over. The two screens below will appear in sequence. Wait for the desktop/login page to appear before proceeding. The system may automatically restart multiple times during this step. Do not turn the system off manually. If the system hangs on one of these pages for longer than 60 minutes, contact Technical Support.

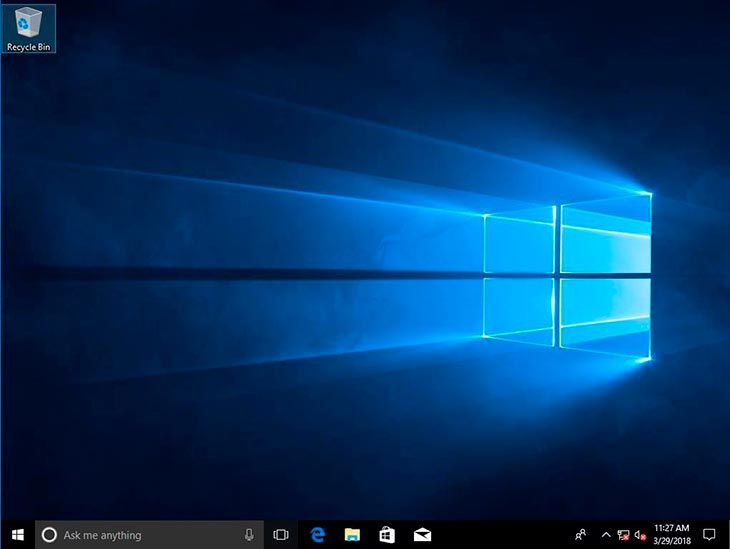
The desktop will appear. The installation of Windows is complete; however, we will want to run updates, install drivers, and activate Windows before regular use begins.
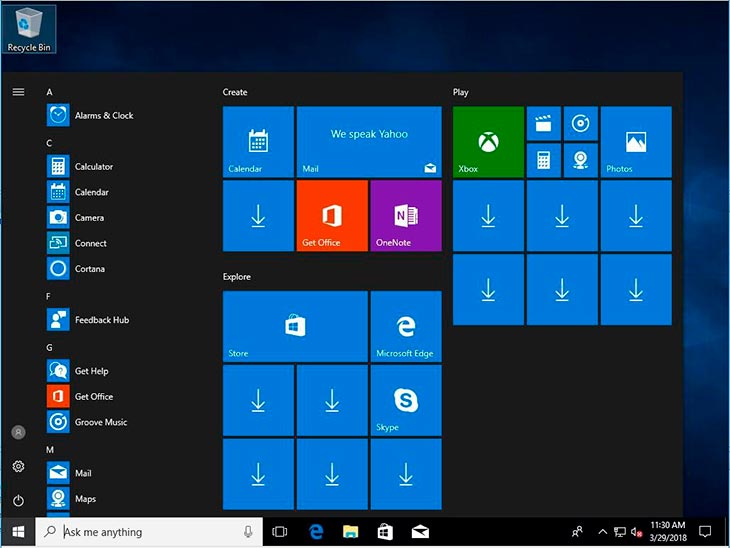
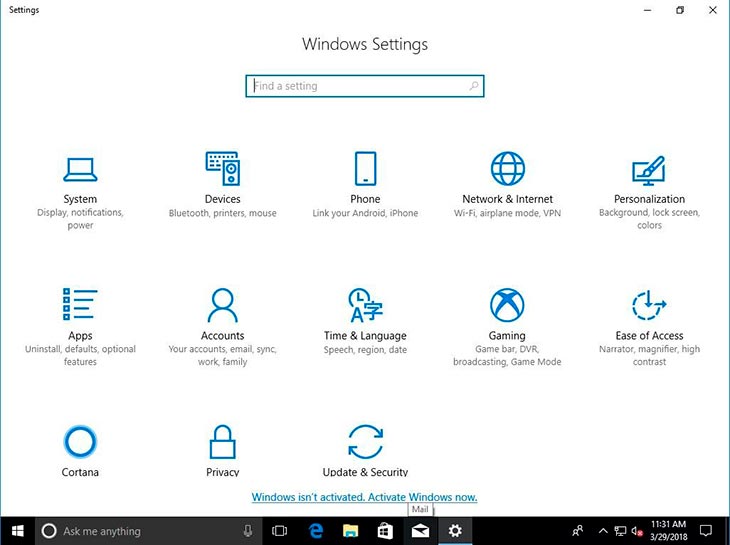
9 Click the Windows icon (start button) at the bottom left of the screen to open the Start Menu and click the gear icon (Settings) near the bottom left of the menu. The Settings page will open.
9.1 Click “Update & Security” at the bottom of the page.
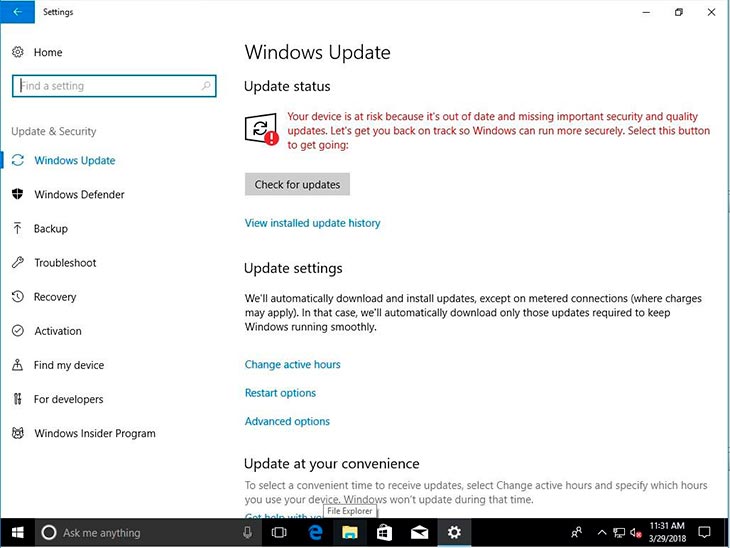
9.2 The page below will open. Click the “Check for updates” button.
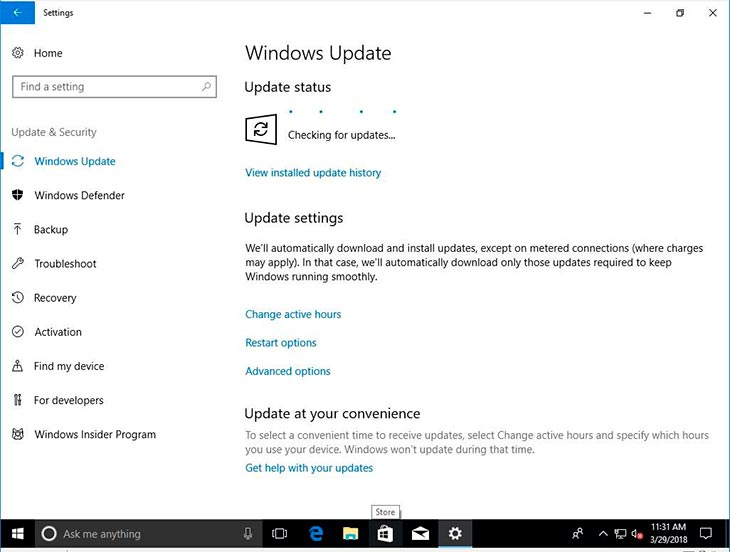
9.3 The system will then begin checking for and installing updates. During the update process, the screen may go black for a few moments and the resolution may change. This is normal, allow the updates to complete.
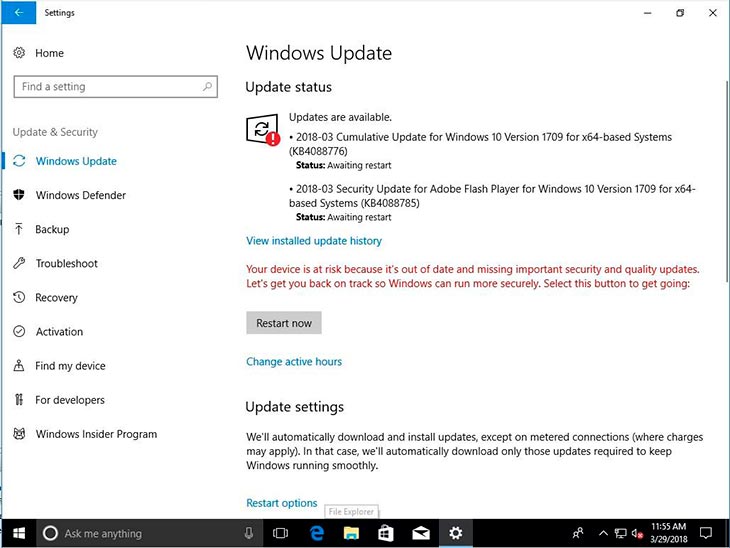
9.4 Oftentimes, a restart will be required to complete some updates. Click the “Restart now” button if this page appears.
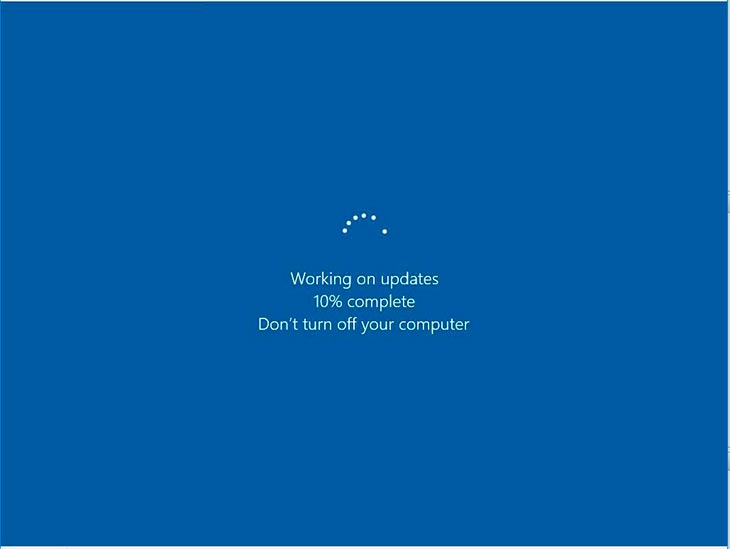
9.5 This page may appear during restarts, do not interrupt this process.
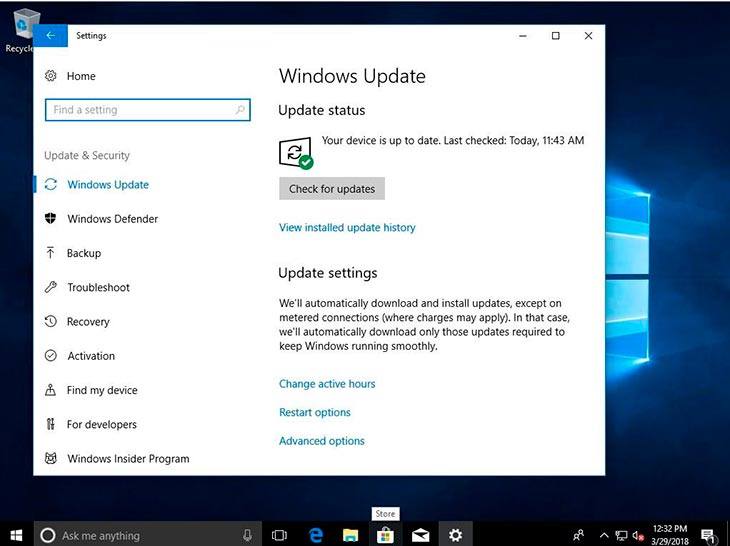
9.6 After each restart, navigate back to the Update page from Settings and click the “Check for updates” button. Once the page below appears, the updates are complete and you can close this window.
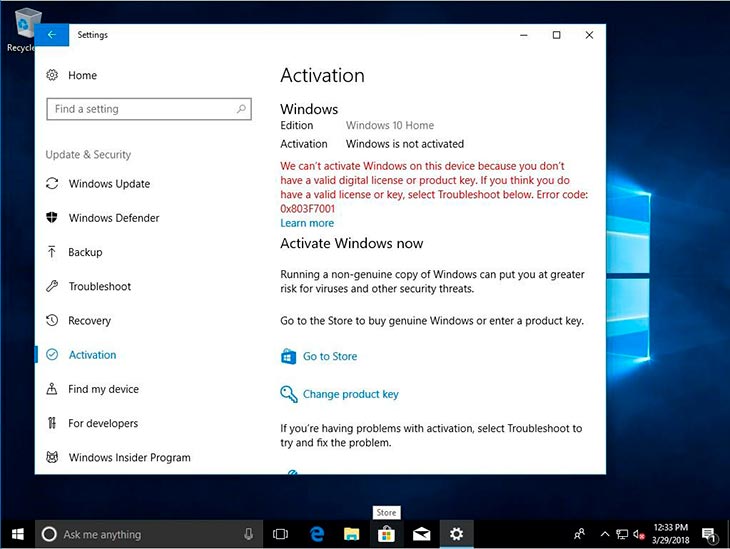
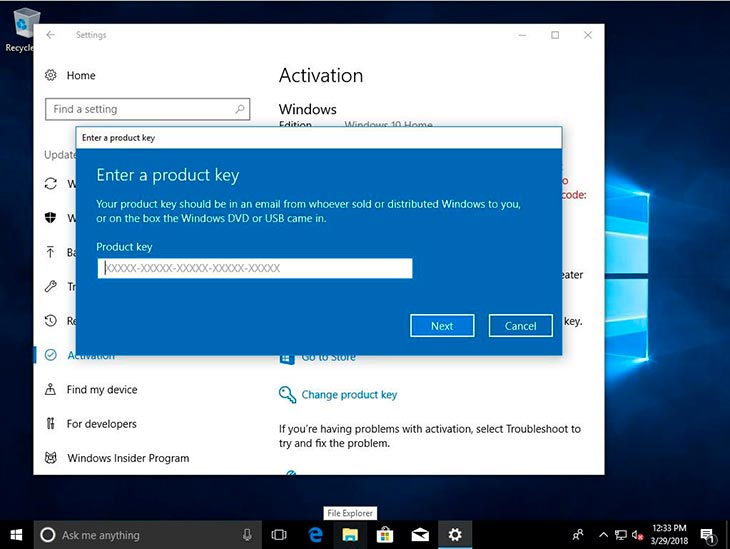
9.7 Finally, we will activate Windows. From the Update page, select the “Activation” link on the left-hand side. The page below will appear. Click on the “Change product key” link.
9.8 This window will pop up. Enter your 25-character product key and click the “Next” button. If activation fails, verify that you are connected to the internet and that you have entered the key correctly. Re-enter the key a minimum of three times and if you are still unable to activate, contact Technical Support.
Notes: If you purchased Windows with your machine, the Product Key is usually a multicolored sticker on the side or back of the computer or contained in your accessory box.
If you have any suggestions to improve this guide, please let us know, your feedback is greatly appreciated.
If at any point you have questions, concerns, or require assistance while completing a Windows install, please call our Technical Support Department at (216) 503-6374.