
Have a random drive cut out or looking to add another drive into your Window 11 system? To get your drive allocated and function within your Windows 11, you’ll need to allocate it with the Disk Management software that comes with your operating system. In this blog, I’ll be showing you how to do just that!
-
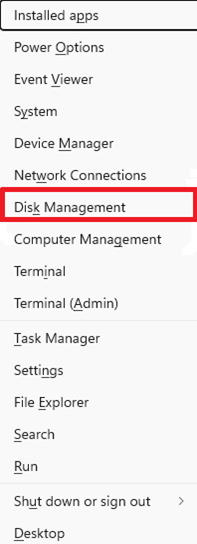
Hit the Windows key + X and click on Disk Management in the Window that appears in the bottom left-hand corner
of your screen:
-
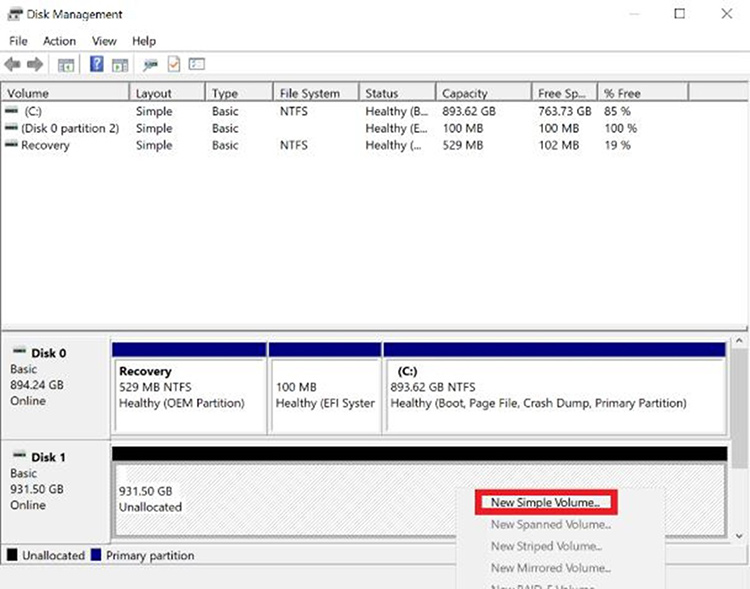
In the disk management window appears you’ll see a set of disks at the bottom, with one or more showing a
black bar. This black bar signifies that the drive has space that has not been allocated into a volume, thus
making it unusable until that has been done. To allocate the drive, simply right-click on the unallocated space,
and click “New Simple Volume”.
-
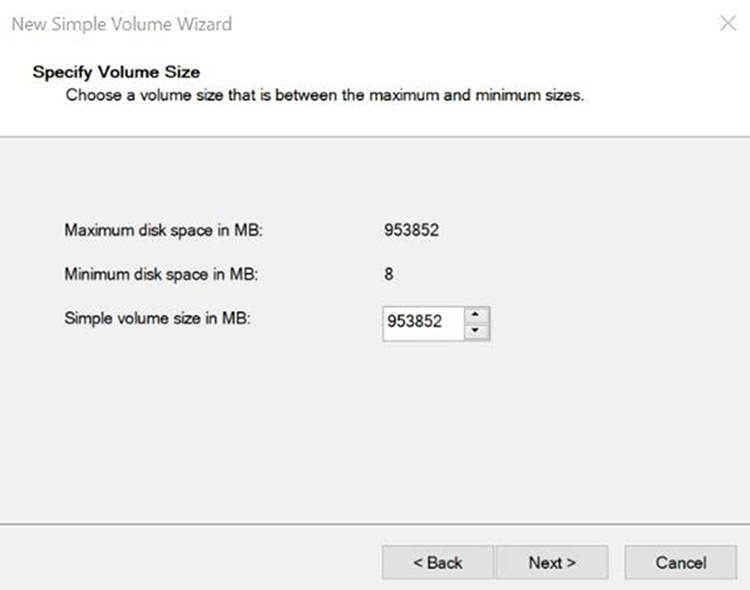
Next, you’ll be presented with a screen where you can select the size of the volume. By default, the
amount is set to whatever your drives maximum capacity is. This can be left at default, though if you plan to
create multiple partitions the size can be reduced to account for additional partitions.
-
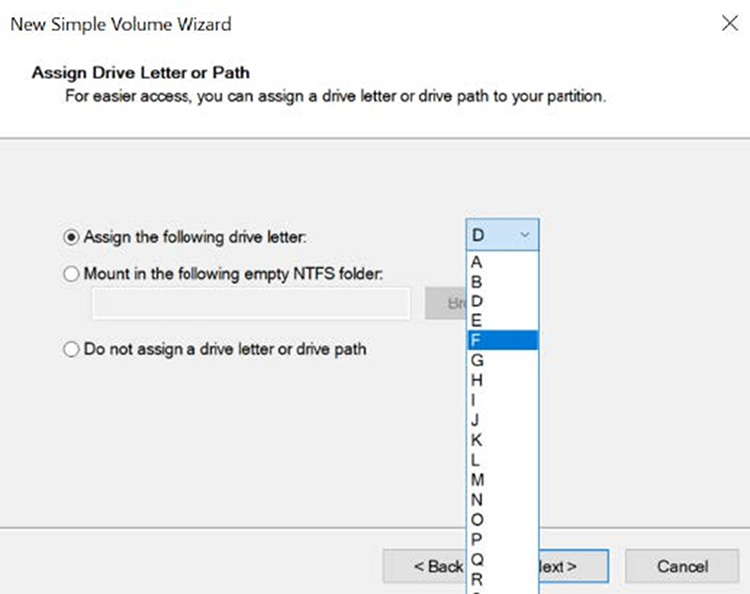
You’ll now be presented with the option to assign a drive letter to the volume. By default, the next
available letter in alphabetical order is selected. You can change the letter do a different one if you choose;
however, any letter that is already in use by another drive (such as C) will be unavailable. This includes flash
drives.
-
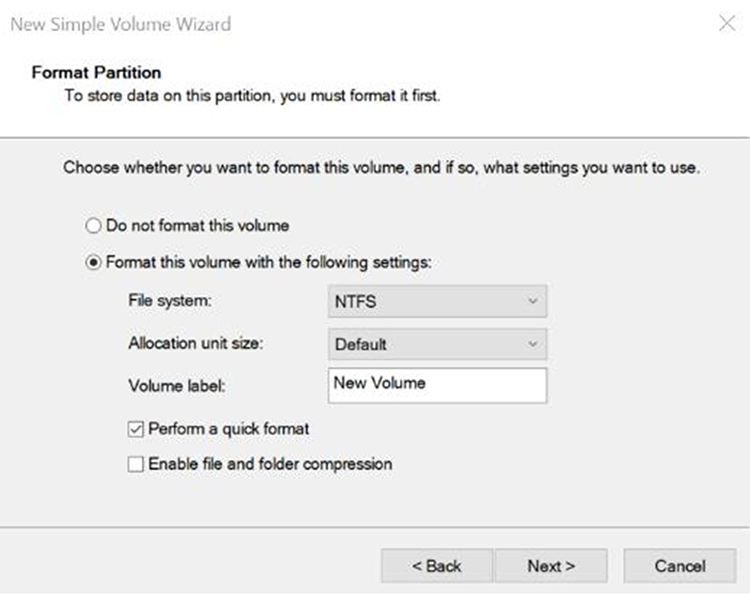
After selecting the desired drive letter, you’ll be presented with the option to label the drive and
format it. A format is recommended to ensure that there won’t be any issues with Windows detecting and
using the drive later on.
-
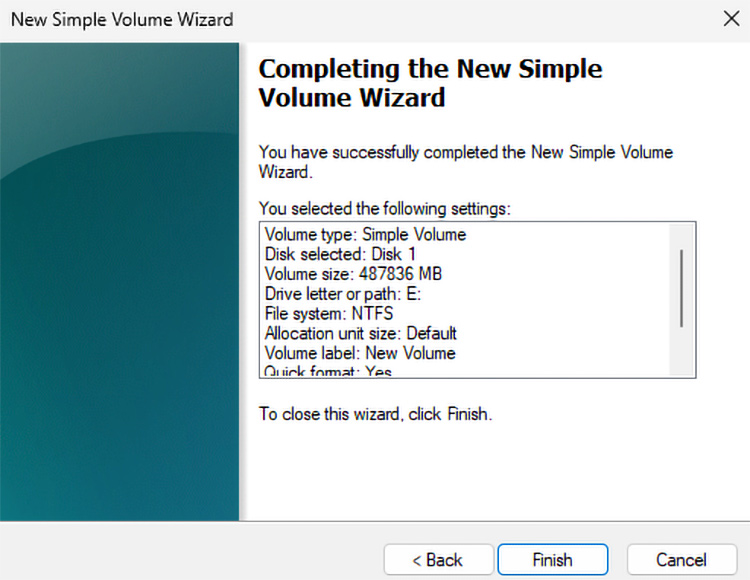
After giving your drive a label and hitting “next”, you’ll have the “New Simple Volume
Wizard” appear before you and all you’ll need to do is hit “Next” again and it’ll
go to the next screen. It will go through the process of setting up your simple volume.
After the Simple Volume is finished, you should end up as the screen (see below). You can press
“Finish”, which will close out that window and then you should have your drive allocated now.
-
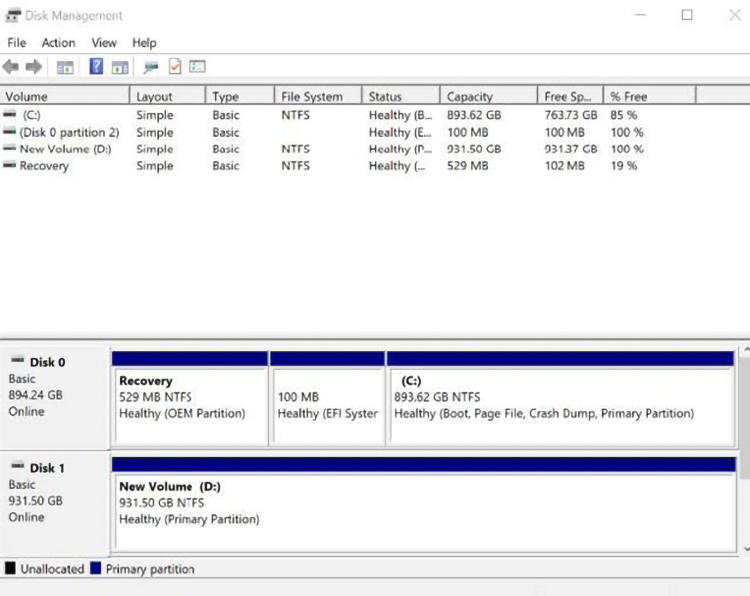
After the above is all done, you’ll be presented with a screen where you can click “Finish” to
exit the screen. Once you do you should see a blue bar next to the drive instead of a black one, with the volume
letter and label below indicating that the process was successful. This can be confirmed by checking the file
browser to see if the drive appears under “This PC”.
Should the above steps not work, or if you have additional questions, please feel free to call our support department at 866-766-4629, or email [email protected] for further inquiries.

Latest News

April 28, 2026
|Jacob Goodheart2026-04-28T07:25:042026-04-28T07:25:04Why different Computers matter
Computers have a myriad of possible uses across the world, some people have them for personal entertainment as custom gaming PC’s, built for high performance
Read post
April 13, 2026
|Joe Mundy2026-04-13T13:08:232026-04-13T13:08:23AVADirect Becomes a Pixotope Globally Approved Vendor: Solving Hardware Continuity for Pixotope Deployments
AVADirect, a company located in Twinsburg, Ohio, has partnered with Pixotope to bring industry-enabling hardware solutions for Pixotope’s award-winning accessible solutions that enable boundary-pushing immersive
Read post